As more people start adopting more DevOps practices, we start to realize that it is hard and takes time to master these technologies and practices. Usually, you would have all your code in change control by now (hopefully) but yo start to realize that is only the tip of the iceberg. But now throw in the mix you have to DevOps, CI/CD, containers, distributed systems on Windows ecosystems and this just got fun.
On this post I want to focus on following technologies like Kubernetes PowerShell, Docker, Jenkins and groovy. The objective is how to setup Jenkins inside a Kubernetes clusters with linux and Windows workers.
Where to find all the code
You can find all the code in my github repo here
https://github.com/gabrielrojasnyc/KubeJenkinsPowershell
What would you need to implement
- MAC to run the docker engine
- Docker Community Edition https://www.docker.com/community-edition
- Jenkins master container https://hub.docker.com/_/jenkins/
- PowerShell container https://hub.docker.com/r/microsoft/powershell/
- Kubernetes https://kubernetes.io/
Ubuntu server in my case I will run it on top of Parallels but Virtualbox or something similar would work
Assumptions
- Have a minimal understanding of Kubernetes
- Know some basic PowerShell
- Basic understanding of Linux systems
- Some knowledge of containers
- Have virtualbox install on your computer
Let’s start
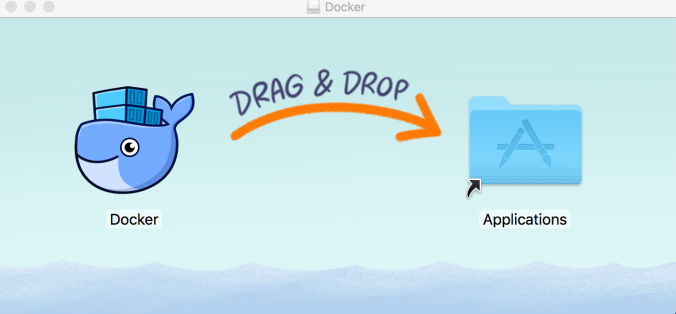
- Lets go to the docker website to download install it. https:https://store.docker.com/editions/community/docker-ce-desktop-mac//www.docker.com/docker-mac

- Now drag and drop
- After it is install open the terminal window and type
docker version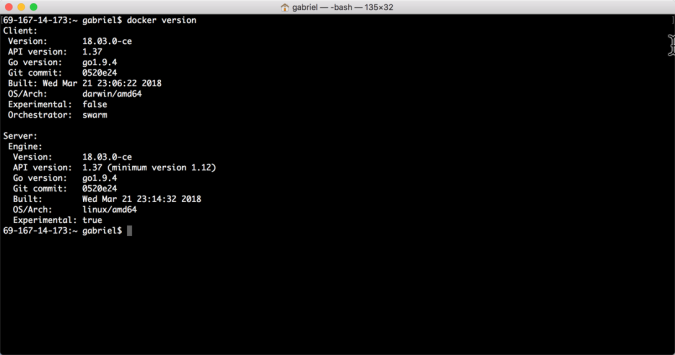
- We need to download and install Minikube to run kubernetes. Minikube is a tool that lets you run Kubernetes locally in your laptop. It needs to run inside a VM. This is only needed for local development.
https://kubernetes.io/docs/getting-started-guides/minikube/ - To install Minikube on your laptop follow these instruction depending on your operating system https://kubernetes.io/docs/tasks/tools/install-minikube/
- You will also need to install kubectl. This the command line tool that kubernetes uses to interact with the environment
https://kubernetes.io/docs/tasks/tools/install-kubectl/ - In my case as I have a MAC i just need to run the following to install these two components
Minikubecurl -Lo minikube https://storage.googleapis.com/minikube/releases/v0.25.2/minikube-darwin-amd64 && chmod +x minikube && sudo mv minikube /usr/local/bin/
Kubectl
curl -LO https://storage.googleapis.com/kubernetes-release/release/`curl -s https://storage.googleapis.com/kubernetes-release/release/stable.txt`/bin/darwin/amd64/kubectlchmod +x ./kubectlsudo mv ./kubectl /usr/local/bin/kubect - Now let see some action. Type
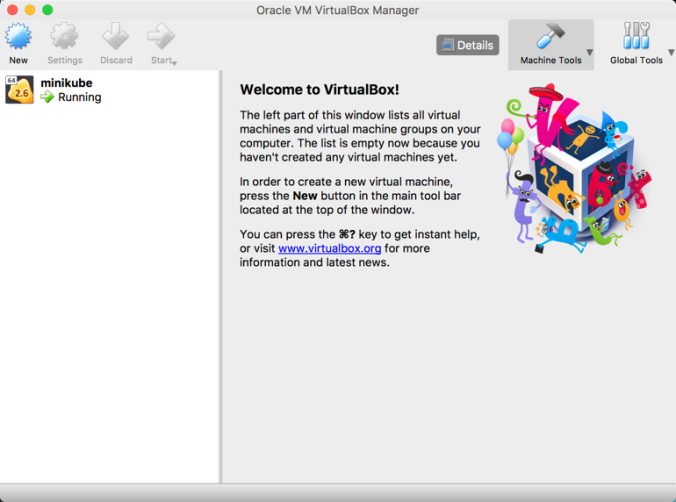
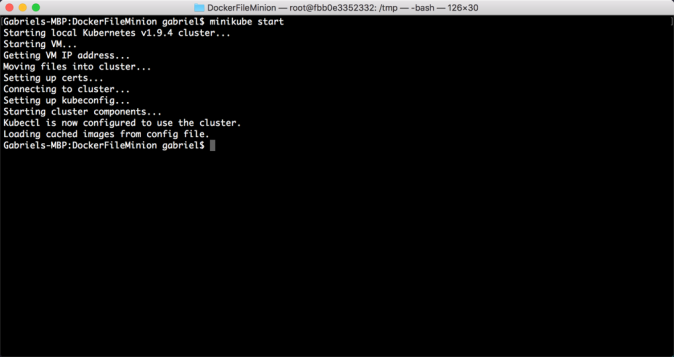
minikube start
You will see the VM starting on VirtualBox and also it will create the Kubernetes cluster
- Now that we kubernetes cluster to play with, we have to make sure we can reuse the docker daemon.
eval $(minikube docker-env)
- After you type the command above and not type
docker psyou will see some containers running for K8 to work

- Let’s open the Kubernetes dashboard as we are going to use see the status of our deployments and to manage our images
minikube dashboard
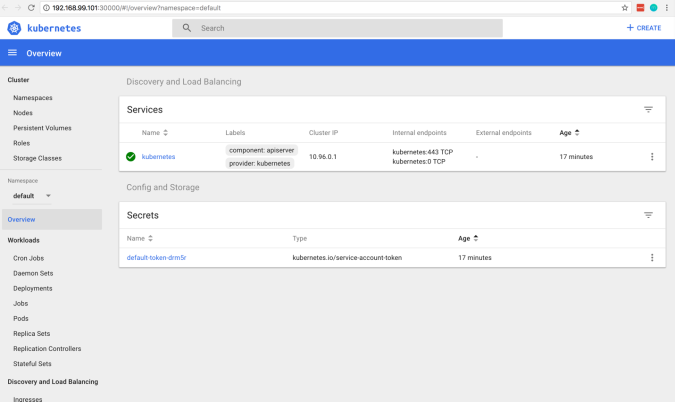
- You can create, deploy, and destroy deployments from the console. But what would be the fun with that, we are going to use command line and make sure we are using version control.
- We are going to create a DockerFile to start our Jenkins master instance the way we need it
This file contains bidirectional Unicode text that may be interpreted or compiled differently than what appears below. To review, open the file in an editor that reveals hidden Unicode characters. Learn more about bidirectional Unicode characters
# From the Jenkins supported version FROM jenkins/jenkins:lts LABEL version=0.1 #using root for installation USER root # Install PowerShellCore RUN apt-get update -y RUN wget https://github.com/PowerShell/PowerShell/releases/download/v6.1.0-preview.1/powershell_6.1.0-preview.1-1.debian.9_amd64.deb RUN dpkg -i powershell_6.1.0-preview.1-1.debian.9_amd64.deb 2> /dev/null ; exit 0 RUN apt-get install -f -y RUN rm powershell_6.1.0-preview.1-1.debian.9_amd64.deb #Plug-ins Installation #Install Kubernetes pluginin RUN /usr/local/bin/install-plugins.sh kubernetes:1.5 #Install ssh plug-in RUN /usr/local/bin/install-plugins.sh ssh-slaves:1.26 #Install PowerShell plug-in RUN /usr/local/bin/install-plugins.sh powershell:1.3 #Install MSBuild plug-in RUN /usr/local/bin/install-plugins.sh msbuild:1.29 # Install git for version control RUN /usr/local/bin/install-plugins.sh git:3.8.0 # Install docker plug-in RUN /usr/local/bin/install-plugins.sh docker-plugin:1.1.3 #Install xunit plug-in RUN /usr/local/bin/install-plugins.sh xUnit:1.102 # Misc plug-ins RUN /usr/local/bin/install-plugins.sh cloudbees-folder:6.4 RUN /usr/local/bin/install-plugins.sh antisamy-markup-formatter:1.5 RUN /usr/local/bin/install-plugins.sh credentials-binding:1.16 RUN /usr/local/bin/install-plugins.sh workflow-aggregator:2.5 RUN /usr/local/bin/install-plugins.sh github-branch-source:2.3.3 RUN /usr/local/bin/install-plugins.sh pipeline-github-lib:1.0 RUN /usr/local/bin/install-plugins.sh pipeline-stage-view:2.10 #update container one more time RUN apt-get update -y #Dropping back to jenkins user security reasons USER jenkins - With this file we can now build our container. Make sure you are the root of the folder when running the following
docker build -t jenkinstest .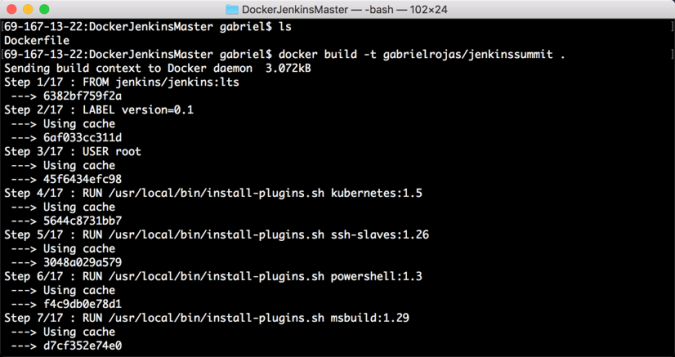
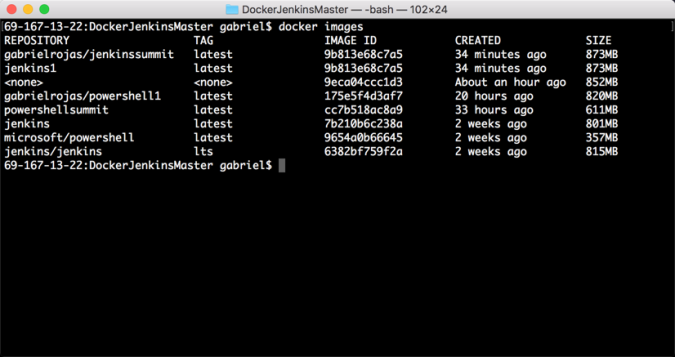
- Now you will be able to see your image if you run
docker images
- Run the following commands to make sure everything is register clean on a new shell window
minikube stop
minikube starteval $(minikube docker-env)
- Now that we have a container lets upload it to docker hub. I will not explain how to to this as there is a good explanation on this here https://docs.docker.com/docker-cloud/builds/push-images/
The simple steps are hereexport DOCKER_ID_USER="username"$ docker login

- Now we need to tag the image that we created from before and upload
$ docker tag my_image $DOCKER_ID_USER/my_image$ docker push $DOCKER_ID_USER/my_image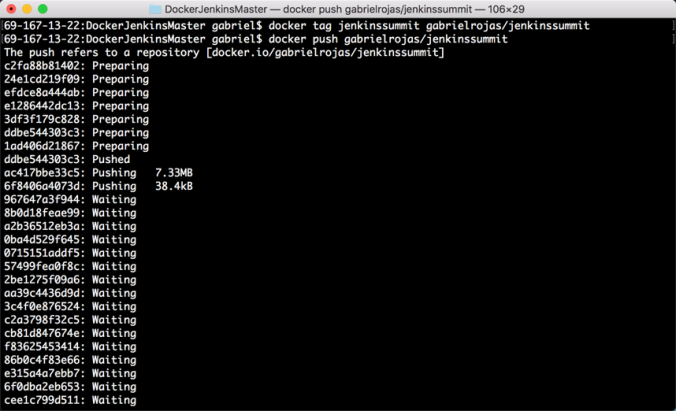
- We are doing all these because Kubernetes likes to download images from the container image hub. I am using docker hub as it is free and easy to use. Please keep in mind this repo are public and use at your own risk. Should not be use for production !!!!
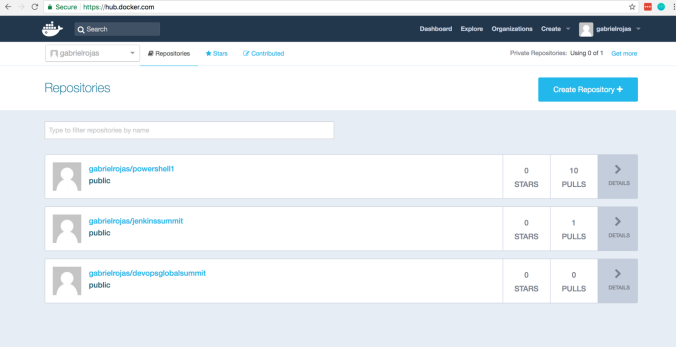
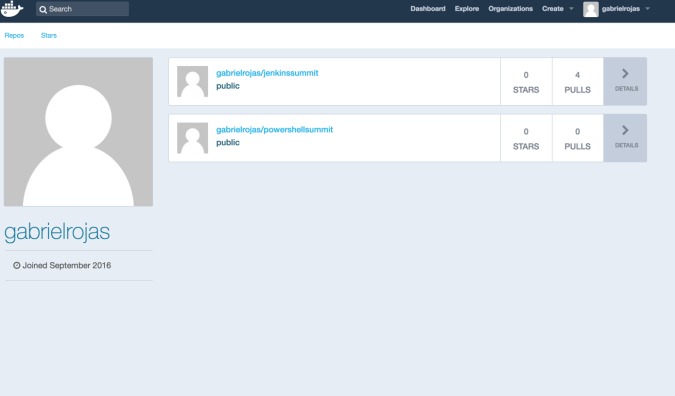
- If you go to you hub.docker.com you will see your container
- Run docker pull to download the image and make sure it is working correclty
docker pull username/jenkinssummit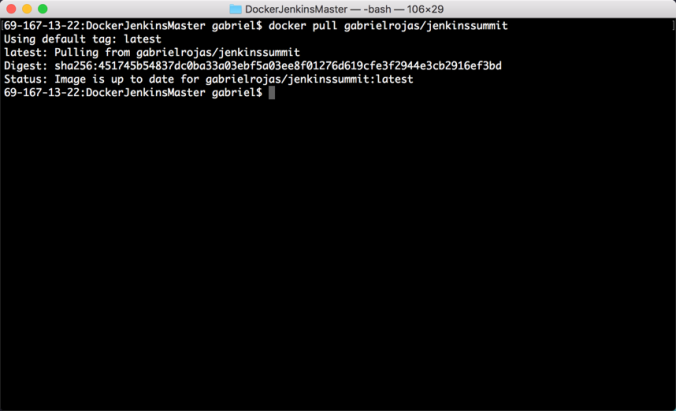
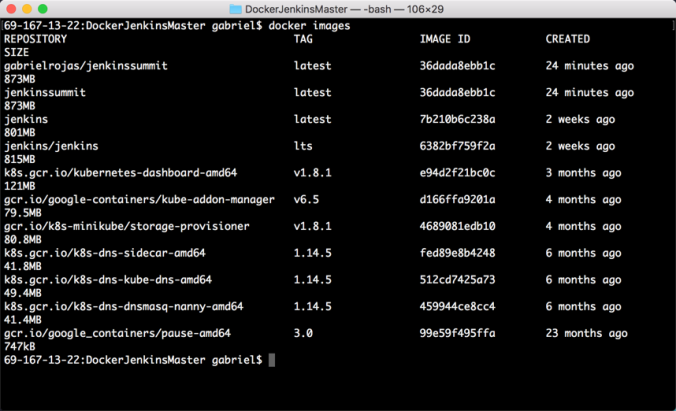
- To check if your image was downloaded you can run docker images and i will show you the current images that you available in your computer
docker images
- Now lets get into Kubernetes a little bit. In order to deploy a Jenkins server in Kubernetes we need to create .yaml document. This is going to be used as deployment configuration
This file contains bidirectional Unicode text that may be interpreted or compiled differently than what appears below. To review, open the file in an editor that reveals hidden Unicode characters.
Learn more about bidirectional Unicode characters
apiVersion: extensions/v1beta1 kind: Deployment metadata: name: jenkins-deployment spec: replicas: 1 template: metadata: labels: app: jenkins spec: containers: – name: jenkins image: gabrielrojas/jenkinssummit ports: – name: http-port containerPort: 8080 – name: jnlp-port containerPort: 31000 volumeMounts: – name: jenkins-persistent-storge mountPath: /var/jenkins_home volumes: – name: jenkins-persistent-storge emptyDir: {} I will not explain each attribute but this website has a good explanation and examples on what they mean
https://www.mirantis.com/blog/introduction-to-yaml-creating-a-kubernetes-deployment/
- We have most of the pieces together lets create the POD using the deployment file
kubectl apply -f JenkinsDeploySummit.yaml

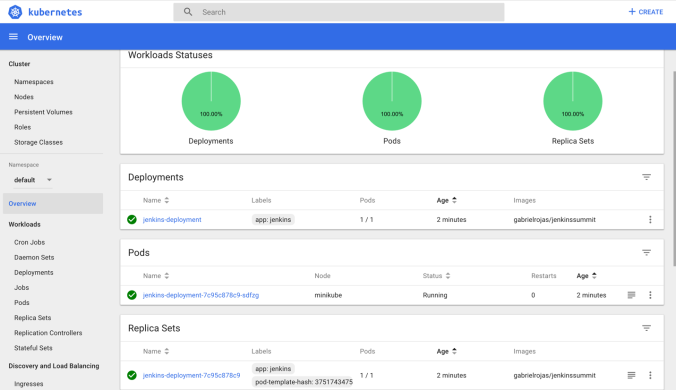
- If you go back to the console you will see our pod deployed
- We are almost done and ready to use Jenkins and PowerShell. Before that we need to create service file. This file will allow to expose the POD outside of Kubernetes for our use. the file will look like this
This file contains bidirectional Unicode text that may be interpreted or compiled differently than what appears below. To review, open the file in an editor that reveals hidden Unicode characters.
Learn more about bidirectional Unicode characters
apiVersion: v1 kind: Service metadata: name: jenkins spec: type: NodePort ports: – port: 8080 targetPort: 8080 name: http-port – port: 31000 targetPort: 31000 nodePort: 31000 name: jnlp-port selector: app: jenkins  You can also see the service running in the console

- If you run
kubectl get servicesyou will see the port that was exposed. In this case it is port 32649

- In order to connect to Jenkins we need to get the IP of minikube and then type the port. You can get it from the console url or by typing
minikube ipIn my case i am going to open new windows pointing to192.168.99.101:32649
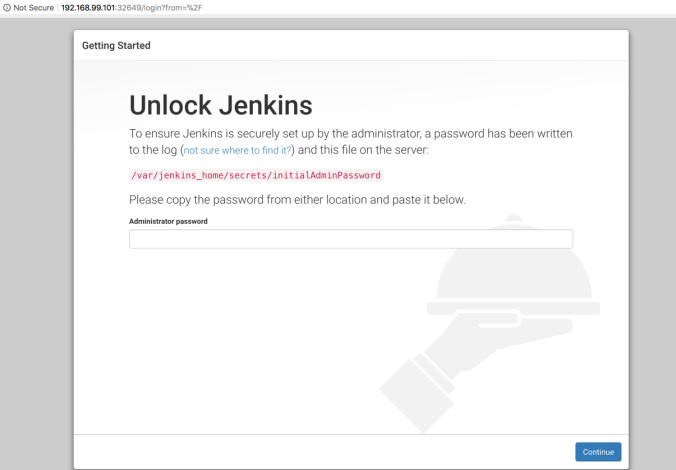
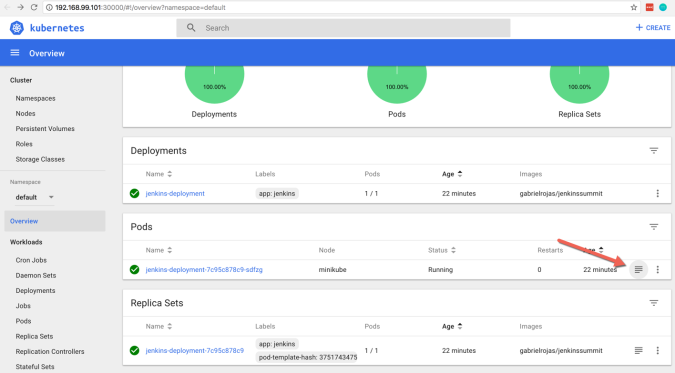
- Now you will wonder how to get the administrator password. On the Kubernetes console go to overview and click on the following under pods. This will show you the logs and you will be able to get password

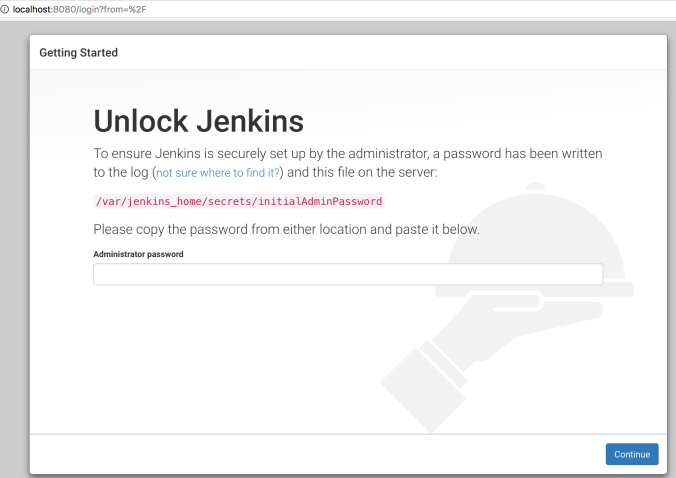
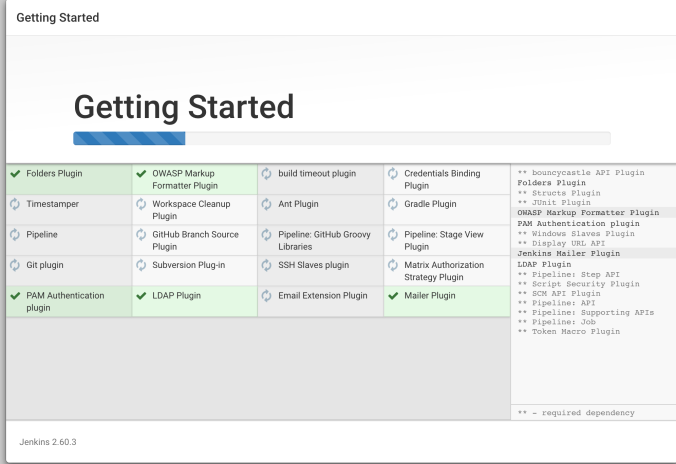
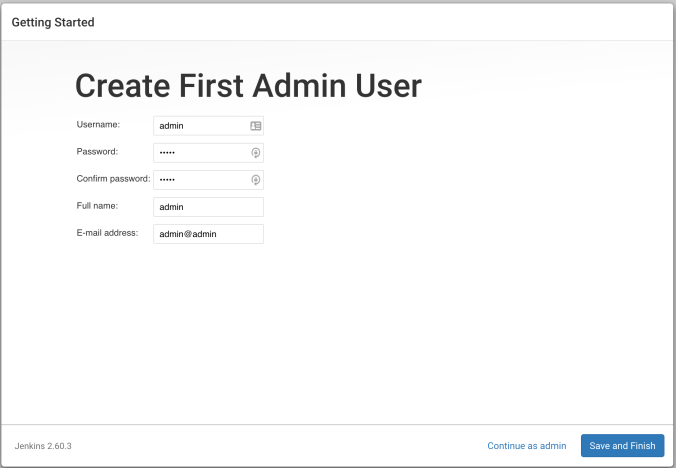
- Copy and paste the administrator password from the terminal window and then click on install suggested plug ins. This may take 5 to 10 minutes
- Now create a dummy user name and password as this is Jenkins master is for testing and will be destroy at some point
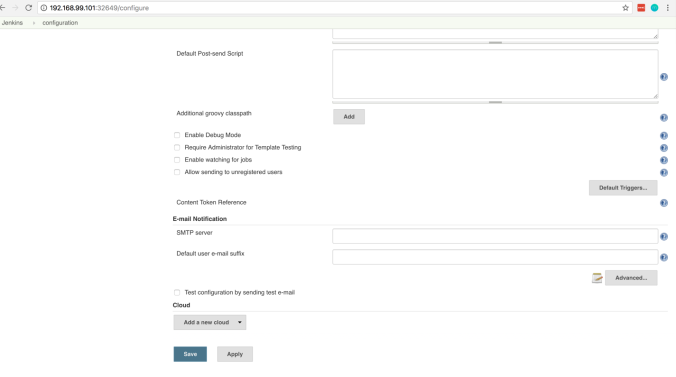
- Let’s now configure Kubernetes plug-in in Jenkins so we can spin workers using Kubernetes backend.
Go to Manage Jenkins -> Configure System
Scroll all the way down where it says “Add a new Cloud”
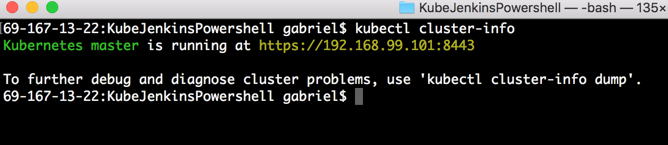
- You will need the following information by running this commands on your shell
kubectl cluster-info
 Get the internal IP of the Jenkins container. You can either doing from the console or using kubectl describe pod
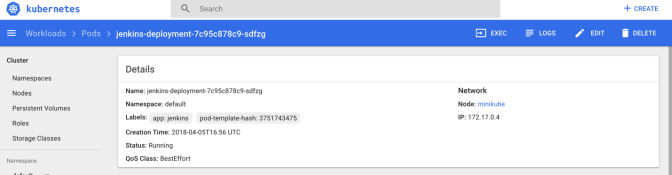
-
In our case
Kubernetes URL is : https://192.168.99.101:8443
Jenkins URL is : http://172.17.0.4:8080 port that we exposed from DockerFileRun a test connection and make sure it is successful
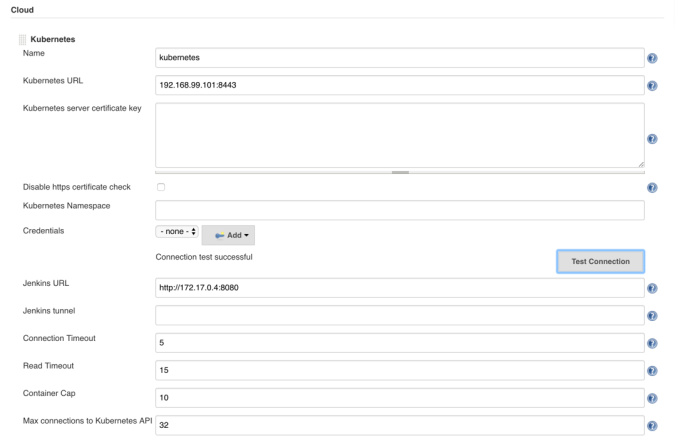
- there is a small change on jnlp port we want to use. The reason I changed on the configs to 31000 is because that is one of the ports that kubernetes exposes to the world.. Make sure to change this under Manage Jenkins -> Global Security

- We need to tell Kubernetes what container to use for our workers. We are going to create a new DockerFile that will use powershell container that Microsoft provides and we are going to install Java.Java is needed for Jenkins to pass commands and information into the container
This file contains bidirectional Unicode text that may be interpreted or compiled differently than what appears below. To review, open the file in an editor that reveals hidden Unicode characters.
Learn more about bidirectional Unicode characters
# Microsoft Powershell Ubuntu image FROM microsoft/powershell LABEL version=0.1 WORKDIR /tmp #Update and install Java RUN apt-get update -y RUN apt-get install default-jre -y RUN apt-get upgrade powershell -y #Files to be copy for demo but this should be downloaded from GIT repo COPY test.ps1 /tmp/test.ps1 #Expose Port EXPOSE 22 8500 50000 CMD /bin/bash - We are going to follow the steps from above to build the container and publish it on Docker hub
docker build -t powershell1 .
docker tag powershell1 gabrielrojas/powershellsummit
docker push gabrielrojas/powershellsummit
- Now that we have our container uploaded lets go back into Jenkins to configure.
Manage Jenkins -> Configure. Scroll all the way down and click on Pod Template.
Fill-out with following information
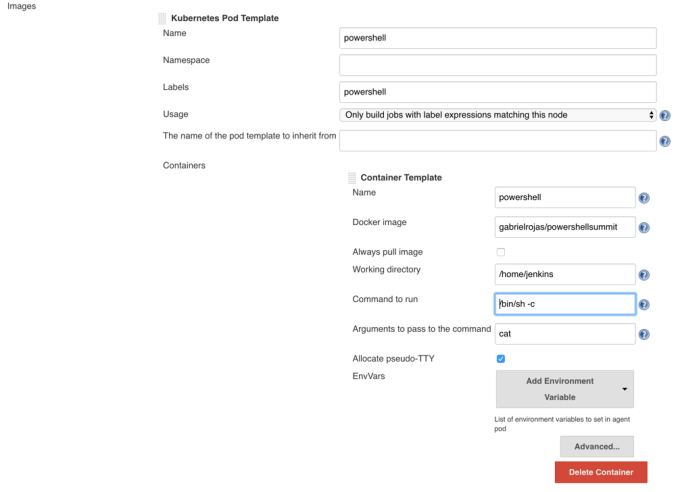
- This should give you access to 2 different containers with PowerShell. Now we are going to configure Jenkins Master in Kubernetes to communicate to a Windows 2016 server.
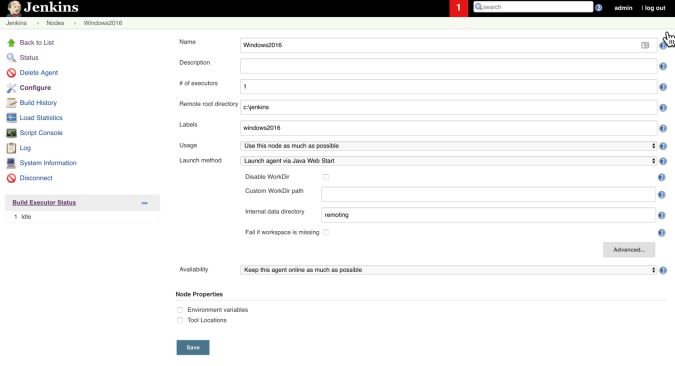
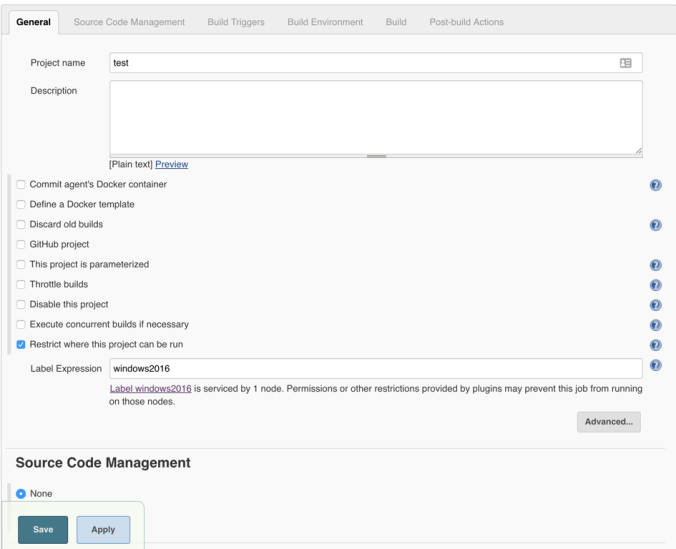
- The first thing to do is to create a node on Windows under Manage Jenkins -> New Node
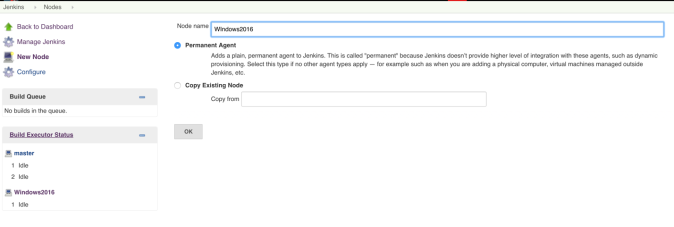
- Now configure the node with this exact parameters
- Login to the Windows machine and open the Internet Explorer to browse to the jenkins master server and type the following
http://jenkinsmasterIP:port/windows2016/slave-agent.jnlp
A new window will pop up, click on file and connect

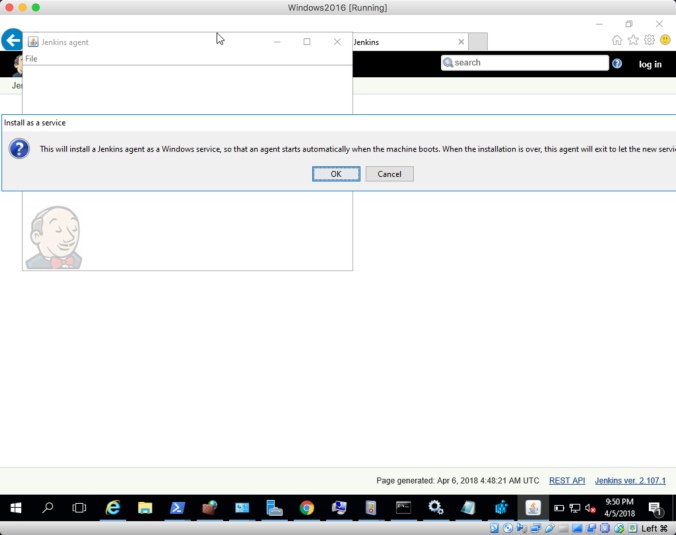
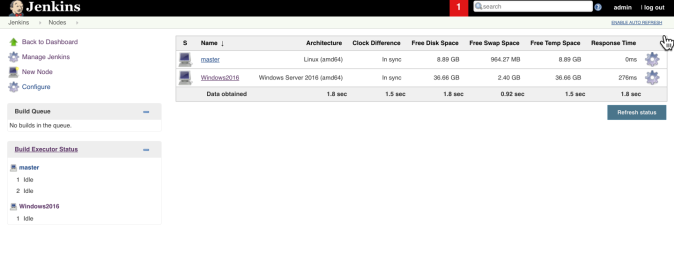
- Now your node should be connected and talking to Master Jenkins container being managed by Kubernetes
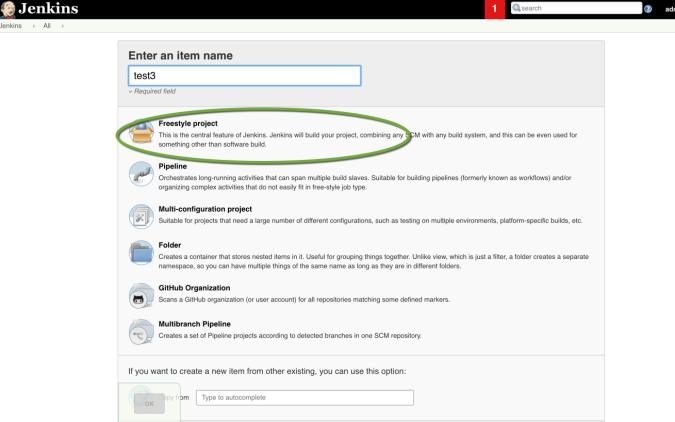
- Lets create a job to run the following code on the windows box to do our UNIT testing. We would need to use xunit to report the failures properly. The configuration will look like this
Click on Jenkins -> New Item -> Select FreeStyle
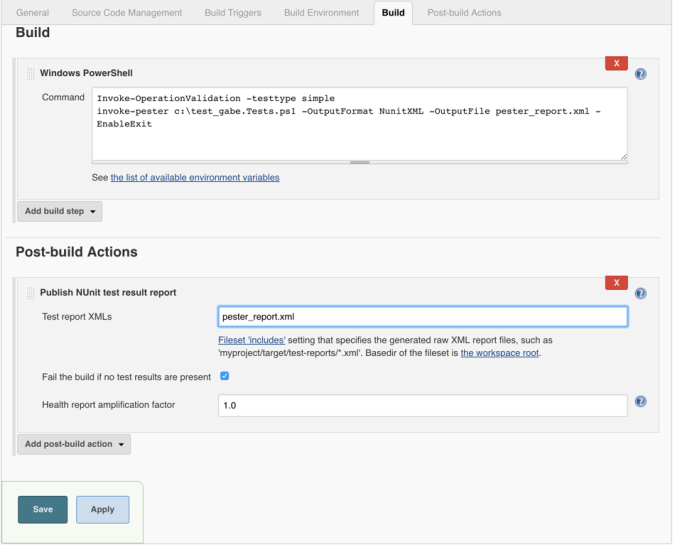
- After you use run the the job you will see the failures.


- This is code I am running for Tests.ps1 to simulate the failure
This file contains bidirectional Unicode text that may be interpreted or compiled differently than what appears below. To review, open the file in an editor that reveals hidden Unicode characters.
Learn more about bidirectional Unicode characters
# To simulate failure pester check Describe 'Service' { it 'is summit installed' { get-service -Name Summit | Should be $true } } - However, the best way to create a job is by creating a pipeline job. The advantage of using this is that all code is version control and it is reusable.
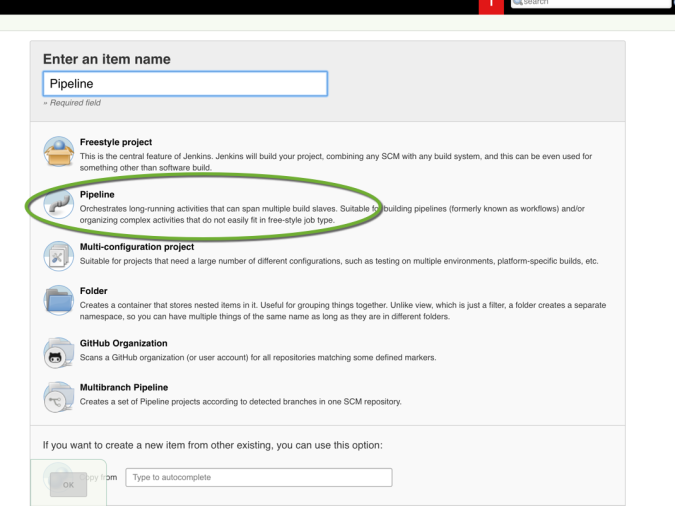
- In this case scroll down and paste your code
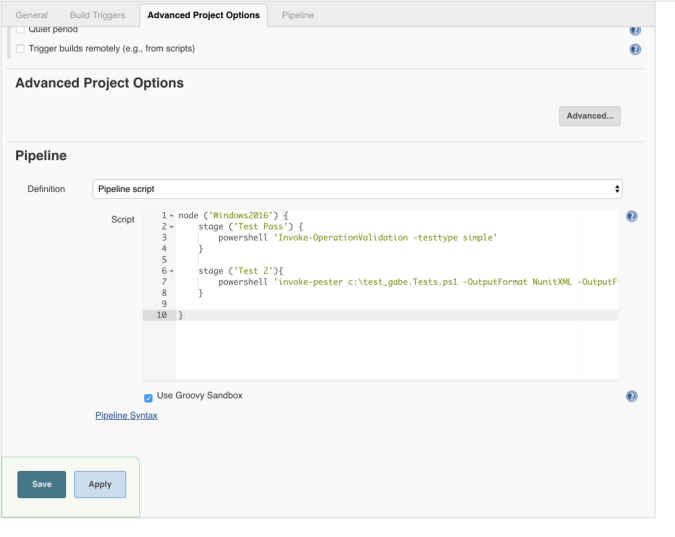
This file contains bidirectional Unicode text that may be interpreted or compiled differently than what appears below. To review, open the file in an editor that reveals hidden Unicode characters.
Learn more about bidirectional Unicode characters
node ('Windows2016') { stage ('Test Pass') { powershell 'Invoke-OperationValidation -testtype simple' } stage ('Test 2'){ powershell 'invoke-pester c:\test_gabe.Tests.ps1 -OutputFormat NunitXML -OutputFile report.xml -EnableExit' } } ENJOY !!!
